


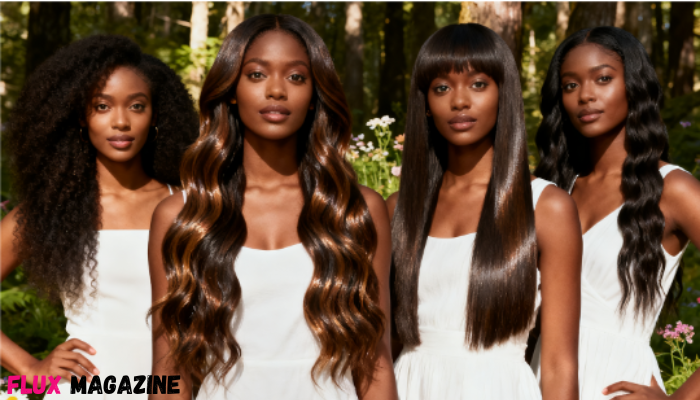
Layering is the soul of hairstyling, especially for long hair. Precise layering cuts add volume and movement while maintaining weight at the ends, preventing the appearance of thinning hair. Today, I’ll share a simple yet effective technique to help you effortlessly master the essence of long layered cuts. This method is not only easy to execute but also ensures consistent, natural blending every time, adaptable to various hair lengths. Whether you desire flowing, lightweight layers or voluminous, full-bodied long layered haircuts, this guide offers invaluable insights. Plus, to help you put these techniques into practice, Luvme Hair is offering new clients an exclusive 30% discount. Keep reading for details.
Step 1: Sectioning and Establishing the Basic Shape
A successful hairstyle begins with precise sectioning. First, brush all hair back and create a part along your natural hairline. Next, starting from the highest point on the crown, take a vertical section extending to just above the ears, completely separating the front and back sections. Ensure both sides are symmetrical and balanced, then secure the front hair with clips to establish a solid foundation for subsequent steps.
Before beginning layering, we first address the back section to establish the length baseline for the entire style commonly referred to as the contour line. If your hair is very thick, we recommend further subdividing it, working with small sections at a time to ensure precision.
To preserve fullness at the ends, we employ the square frame contouring technique. This involves combing all hair backward and aligning the side sections with the center section. Through this overlapping guide method, we pull the side hair toward the rear center, much like flattening a rounded edge into a square. This approach maximizes thickness along the hairstyle’s edges, preventing the ends from appearing thin.
Once you’ve established the first baseline, release the remaining back hair, locate your guideline, and connect it to the rest of the hair.
Step 2: Establishing the Layering Guide Line
With a clear contour line, the next step is to establish the guideline for layering. The quality of this guideline directly determines the harmony and aesthetic appeal of the entire layered effect.
First, take a vertical section about one inch wide from the center of the crown. When lifting this section, decide how much thickness you want to preserve at the ends. This is a crucial step that directly impacts the final layered effect. If your hair is fine and soft, consider letting more hair fall naturally to maintain volume; if your hair is thick, you can remove some weight to reduce heaviness. Personally, I prefer letting all hair at the nape and back fall naturally. Begin layering from this area to maximize retention of thickness at the ends.
We’ll employ vertical cutting, creating layers along straight vertical lines. This method ensures uniform layering throughout the section. To add more short layers ,especially dynamic movement at the crown pull all hair upward until only the top section remains. Here, you’ll notice a weight angle that needs trimming this is the section to remove. For deeper layering, pull hair toward the front of the head to reveal additional weight angles; trimming these creates richer dimension.
This approach establishes a diagonal line slanting from the center to the sides, placing the shortest layers at the mid-back while seamlessly connecting to the length of the ends. After completing the guideline, divide it into two halves to provide clear guidance for the upcoming left and right side cuts.
Step 3: Section Cutting and Detail Work
Now we formally begin layering the sides. We’ll use the left side as an example; repeat the same process for the right.
Comb the guideline together with the left-side hair. For easier handling, subdivide the left hair into three sections. The first section is the guideline itself. The second section radiates outward from the crown. The third section is the outer layer near the hairline. This method allows for methodical cutting, ensuring each section receives proper attention.
We’ll follow the previously established guide line for cutting. First, comb the first section until the hair at the nape naturally falls forward. You’ll see the guideline simply cut along it. Next, pull all the hair upward, locate the guideline again, and cut. Finally, pull the hair completely forward and trim away any excess weight angles.
After completing the first section, take a small portion of hair from it to serve as the new guideline, and proceed to cut the second and third sections. Repeat the same process: pull the hair upward, find the guideline and cut, then pull forward and trim away any excess weight angles. Especially on the outermost section, be mindful to use an “over-guiding” technique pull this hair backward to avoid cutting too much volume, ensuring sufficient thickness around the hairline. For those wanting to experiment with different lengths and styles, the 30 inch straight frontal wig is an excellent choice. They allow you to effortlessly switch up your look without damaging your natural hair.
Step 4: Repeat and Check
After completing one side, replicate the same sectioning and cutting steps on the opposite side. Systematic division is key to achieving layered cuts efficiently. Once you grasp the essence of the guideline, the entire process becomes remarkably straightforward.
Following the completion of both sides, conduct a final cross-check. Lift hair from the crown area vertically upward. At this point, the comb should be held horizontally. If any unevenness is detected, make minor adjustments. This cross-check is crucial as it serves as your final guide for the top layers, ensuring balanced distribution. This method yields a perfectly layered style that maintains thickness at the ends. This differs from some trendy “butterfly cuts,” which sometimes sacrifice end density, resulting in thinning tips.
Final Styling Touches
After cutting, blow-dry using a barrel brush to showcase the created layers perfectly. Once dry, you’ll notice that all layers seamlessly blend, maintaining healthy, substantial ends. Gently shake your hair to reveal the dynamic movement and volume achieved through layering.
Additionally, incorporate face-framing layers for a more polished look. These layers beautifully frame the face and seamlessly connect with the longer layers at the back. If you wish to experiment with different styles, the 28 inch lace front curly wig allows you to effortlessly achieve multiple looks while maintaining the health of your natural hair.
Whether using wigs or your own hair, mastering these techniques empowers you to confidently style various looks and create your own unique signature style.
New Customer Special – Get 30% off your entire purchase with code: SNU30
General Discount – Get 26% off with code: SMC26
Spend & Save Deals:
SMD20 – Save $20 on orders over $129
SMD40 – Save $40 on orders over $179
SMD70 – Save $70 on orders over $279
SMD110 – Save $110 on orders over $379
Summary
Mastering the essence of long layered cuts lies not only in the technique itself, but in a deep understanding of hair volume, texture, and overall balance. By applying the sectioning, guideline establishment, and cutting techniques introduced in this article, you can create rich layers and movement while maintaining weight at the ends. This approach prevents hair from appearing thin while ensuring each cut is precise and efficient. A well-executed layered style effortlessly reveals its unique charm during daily blow-drying or styling. May this guide inspire you to create the perfect long layered hairstyle you envision.


Show Comments (0)